Divide an image into blocks using OpenCV in C++#
Often you will need to divide an image into multiple blocks of a certain height and width to apply a certain transformation or would like to compare two images block-wise. This blog will provide a short explanation and a C++ implementation for how to divide an image into multiple blocks with custom height and width.
Approach#
There are various ways of approaching this problem; most approaches out there compute the number of blocks in xy-directions and use for loops to cut the blocks. In this blog, the dimensions of the blocks are prioritized, therefore, we will need to make sure to crop the side blocks and lower blocks correctly even if their dimensions are different from the other blocks.
To elaborate on this a bit more: if the image width = 512 px and the block width = 128 px -> we will get 512 / 128 = 4 blocks. However if the image width = 576 px and the block width = 128 px -> we should get 4 blocks with 128 px and 1 block with width 64 px. Therefore on each loop we need to check/ compute the block dimensions. Moreover, to keep the code fast and optimal, we will use while loops, that will iterate over the y-coordinates (Top to bottom) then the x-coordinates (left to right).
--> The previously described steps are implemented in the following snippet:
 1#include <Windows.h>
 2#include <opencv2/opencv.hpp>
 3#include "opencv2/imgproc.hpp"
 4#include "opencv2/highgui.hpp"
 5#include <opencv2/core/utils/filesystem.hpp>
 6
 7
 8int divideImage(const cv::Mat& img, const int blockWidth, const int blockHeight, std::vector<cv::Mat>& blocks)
 9{
10 // Checking if the image was passed correctly
11 if (!img.data || img.empty())
12 {
13              std::wcout << "Image Error: Cannot load image to divide." << std::endl;
14      return EXIT_FAILURE;
15 }
16
17 // init image dimensions
18 int imgWidth = img.cols;
19 int imgHeight = img.rows;
20 std::wcout << "IMAGE SIZE: " << "(" << imgWidth << "," << imgHeight << ")" << std::endl;
21
22 // init block dimensions
23 int bwSize;
24 int bhSize;
25
26 int y0 = 0;
27 while (y0 < imgHeight)
28 {
29   // compute the block height
30   bhSize = ((y0 + blockHeight) > imgHeight) * (blockHeight - (y0 + blockHeight - imgHeight)) + ((y0 + blockHeight) <= imgHeight) * blockHeight;
31
32       int x0 = 0;
33       while (x0 < imgWidth)
34       {
35     // compute the block height
36         bwSize = ((x0 + blockWidth) > imgWidth) * (blockWidth - (x0 + blockWidth - imgWidth)) + ((x0 + blockWidth) <= imgWidth) * blockWidth;
37
38               // crop block
39               blocks.push_back(img(cv::Rect(x0, y0, bwSize, bhSize)).clone());
40
41               // update x-coordinate
42               x0 = x0 + blockWidth;
43       }
44
45       // update y-coordinate
46       y0 = y0 + blockHeight;
47 }
48 return EXIT_SUCCESS;
49}
The previous snippet represents a small function with an integer output reflecting the run status of the function.
divideImage() takes in 4 inputs which are the image to divide, the blocks width, the blocks height and a vector variable to store the cropped blocks in.
The main call#
Let's call the previous function in a main function and save the resulting blocks in a defined directory to visualize the results and verify, that the code is doing what it is supposed to do. For the purpose of this test I chose to use the famous Lenna picture, that can downloaded from here. In code this can be done as follows:
.png)
 1int main()
 2{
 3 // init vars
 4 const int blockw = 128;
 5 const int blockh = 128;
 6 std::vector<cv::Mat> blocks;
 7
 8 // read png image
 9 Mat image = cv::imread("Lenna.png", IMREAD_UNCHANGED);
10 cv::imshow("Display window", image);
11
12 // divide image into multiple blocks
13 int divideStatus = divideImage(image, blockw, blockh, blocks);
14
15 // debug: save blocks
16 cv::utils::fs::createDirectory("blocksFolder");
17 for (int j = 0; j < blocks.size(); j++)
18 {
19   std::string blockId = std::to_string(j);
20       std::string blockImgName = "blocksFolder/block#" + blockId + ".png";
21       imwrite(blockImgName, blocks[j]);
22 }
23
24 return 0;
25}
The full code can be found in this gist: DivideImageUsingOpenCv.cpp.
Result#
The resulting blocks should look something like this:
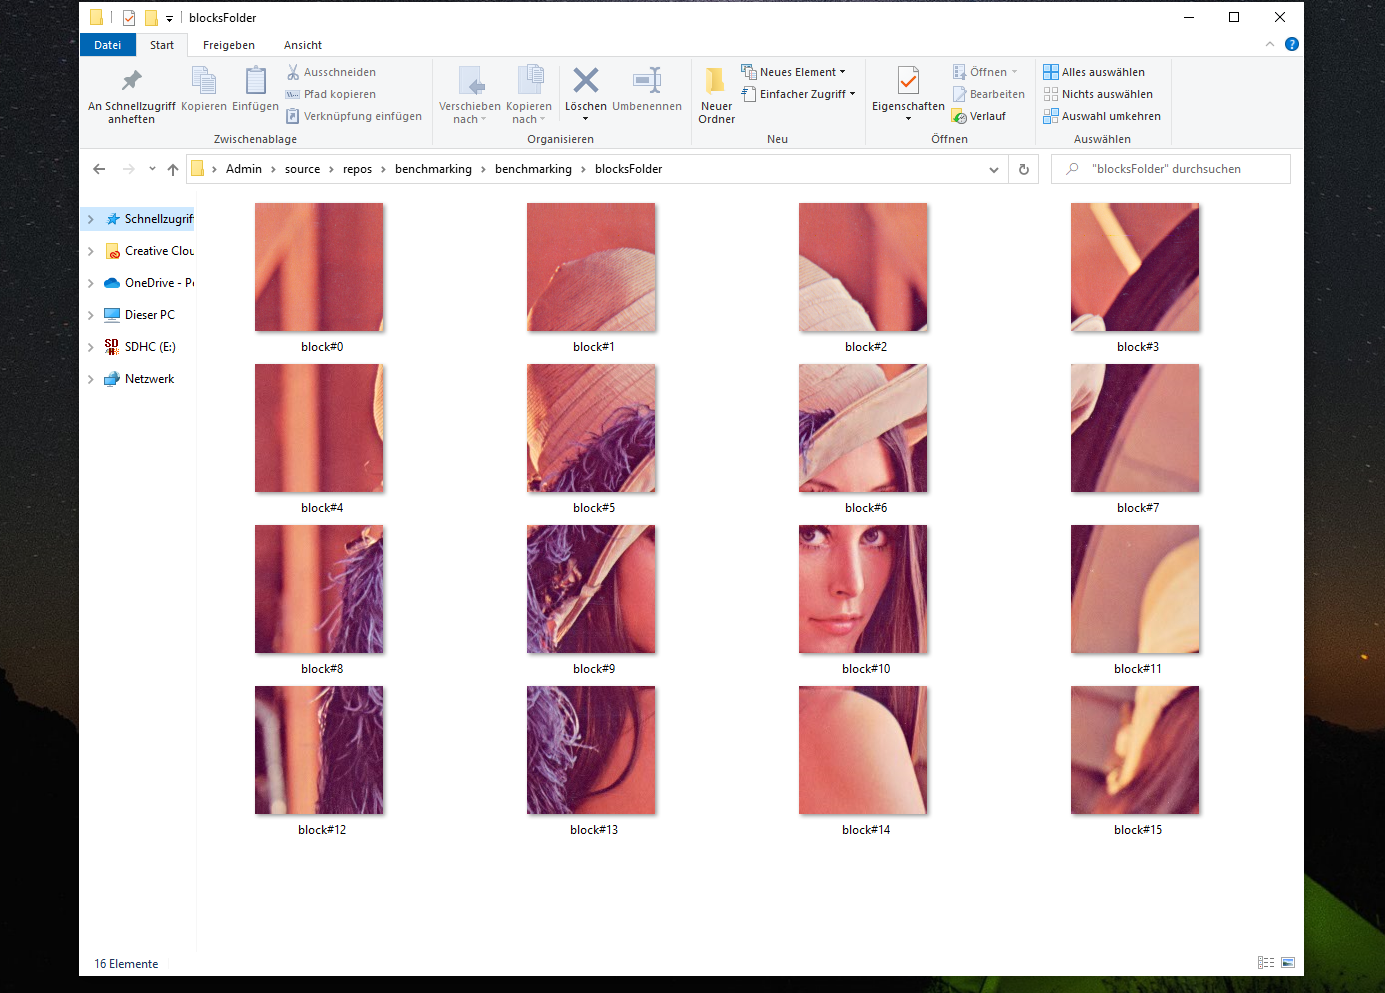
Figure 19: divided image into multiple blocks#
Limitations#
In some cases the user might want to have equally sized blocks or a predefined number of blocks. Therefore, in such case, the dimensions of the blocks should be pre-computed if the user wants to use this snippet. However, tweaking the code for such use-case should be simple to do.
NB: This code has only tested on Windows 10.
Conclusion#
To summarize, in this post we introduced a small example of how to divide an image into multiple blocks with predefined height and width using OpenCV in C++. We also went through saving the resulting blocks to the hard drive in order to verify that the code is functional. The code is fairly simple and supports various image encoding types(PNG, JPEG etc.) but do we need OpenCV to achieve this? can this be done differently? The next blog should provide an answer for this.
References and Further readings#
Crop a big picture into several small size pictures, Graphic design, https://graphicdesign.stackexchange.com/questions/30008/crop-a-big-picture-into-several-small-size-pictures
Divide 256*256 image into 4*4 blocks, Matlab, Stackoverflow, https://www.mathworks.com/matlabcentral/answers/33103-divide-256-256-image-into-4-4-blocks
Divide an image into lower regions, OpenCV, https://answers.opencv.org/question/53694/divide-an-image-into-lower-regions/